Woodworking Projects
Background
I've never been very good about taking pictures of my projects,
especially in earlier years before the days of digital cameras.
So some of these are scans of 'old fashioned' pictures - some
not in the best of shape. Here goes - starting with the latest projects...
Another update...
This
a lamp in oak, walnut and cherry from plans in Wood Magazine. I also
added a KAUF smart RGB bulb which integrates with my Home Assistant
implementation.
Here's
a Limbert style lamp stand (or fern stand) in cherry with walnut inlays
which I built recently from plans in Popular Woodworking Magazine.
About
40 years ago I built a dining room table and we purchased a set of 6
oak chairs. I have always wanted to build 2 more to sort of complete
the set. Unfortunately the lack of time as well as availability of 6/4
oak got in the way. After 40 years, the chairs were also in need of new
upholstery which I had put off for a long time. Recently I received
some pew ends that were removed from our church after they were removed
because of warping. The pew ends were 2" thick so now I had the raw
material and time so we now have a full set. Here are pictures of the
pew ends, an existing chair, a new unfinished chair, the 2 new chairs
finished, one of the newly upholstered chairs, and finally the whole
set. Of course the new chairs made the old chairs look really bad so I
had to completely sand and refinish the existing chairs before
re-upholstering.
A
while back I built a bench for the guest bedroom in walnut. I liked the
result so much that I built a similar bench in cherry for the master
bedroom. It fits in really well with the cherry and maple furniture.
The
last quilt racks I built had purchased inlays so I wanted to make my
own inlays since I now have a CNC machine. This rack has sort of a
compass inlay done in walnut, cherry and maple. I took this rack into
the Cancer Center since we have lots of quilts and blankets that were
doanted and we needed a way to display them. I quickly realized that,
although the spacing of the dowels might be aesthetically pleasing, it
didn't work vary well for displaying quilts. The 2nd and 4th dowels are
just too close to the 1st and 5th dowels. See the following pictures
for my solution.
As
I mentioned above, I needed a re-design for the actual quilt hangers,
so I went with rectangular cross sections and matched the size and
wedge configuration of the cross beam at the bottom of the rack. I also
wanted an inlay that fit the location a little better so chose the
traditional ribbon with a small heart inlay in cherry and maple.
I
had some walnut left over from a previous project and I also wanted a
luggage rack for the guest bedroom so I built this. The idea came from
a Wood Whisperer project.
This just a simple shop-built malllet.
One
of my friends from Habitat was retired from the King County Sheriff's
office. He had received numerous badges during his career and wanted to
inlay them into a table and then put a piece of glass over them. He had
a nice piece of teak and wanted me to do the inlays on my CNC. It
proved to be a little challenging since the badges all had 7 points and
were all slightly different. The final result came out great and he was
very pleased.
A couple of small projects - a remote caddy for the TV and a rack for Keurig K-cups.
I had been wanting to try this techniques for a while and I made 4 or 5 of these serving trays. They came out great
I spent some time recently building some shop projects that I had wanted/needed for a while.
The first project was a miter saw stand that I built using plans from Fix This Build That. I will probably add more features in the future like better stops and a tape but this will do for now.
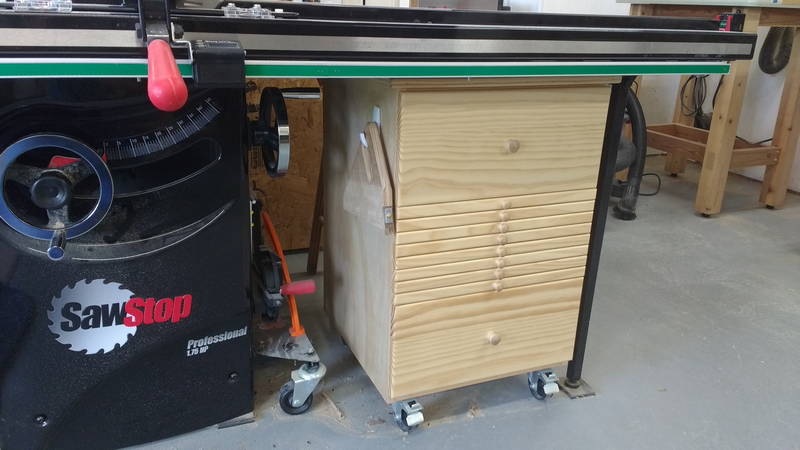
Next
was a cabinet to go with the new Saw Stop Table Saw. I had some of this
stuff on a peg board but this works much better - especially for
storing blades. It was kind of a combination of various plans and ideas
I found on the web.
Finally a new saw deserves a new crosscut sled.
I
also decided to build a smaller sled since most of my crosscuts are
narrower pieces and I also wanted to add all of the features I wanted
in another sled. So this one has 3D printed blade guard as well as a 3D
printed flip stop and hold down clamps. I also added replaceable
inserts in the bed as well as the fence. Finally I can add an extension
to the fence for longer cuts. This is what I ended up with.
We
looked for a long time for a wooden light fixture to replace one in our
kitchen eating nook. We had the current fixture for a long time and,
although we liked it, we
wanted something different. We never found something that worked for
us so I decided to try to make one. This fixture is oak with walnut
accents and LED inserts meant to replace can lights for the lights
themselves. Once I finished the fixture, I decided that metal hanging
chains didn't make it so I made oak chains to hang the light. To make
the chain I cut out individual links from 1/2" oak on my CNC (although
they could also have been cut out on a scroll saw). I cut these with the grain
running parallel to the long axis of the links and then
made a couple of holding jigs and used a 1/4" radius router bit along
all edges to shape the links.
Finally I put every other link in a vise and smacked it with a mallet
to
break it along the grain after which I threaded full links on the
broken link and glued it back together. The links all broke cleanly and
the glue lines are completely invisible. I'm really pleased with how
this worked out.
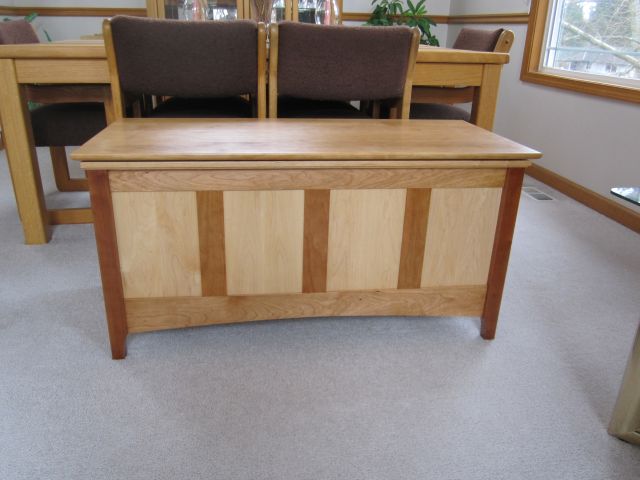
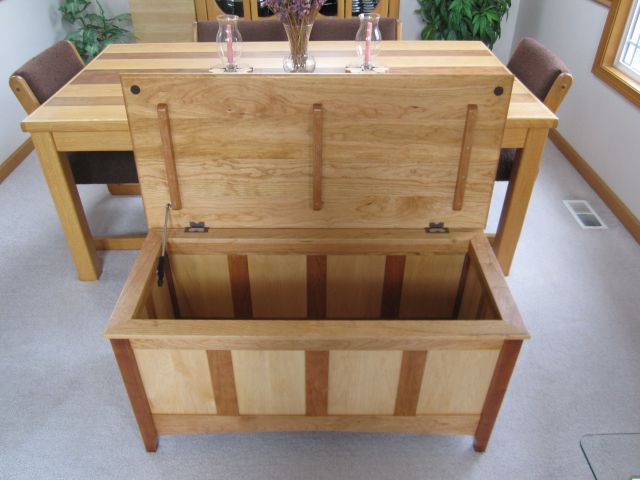
This next project is a mission style ottoman in cherry based on a David Marks design.
I love working with cherry - beautiful wood, machines well, and
finishes great. There are several pictures at various stages of
the project.
Parts machined and ready for glue up.
Ottoman glued and sanded and ready for finish.
And the finished piece.
This
is the coffee table I built to match the new end tables and new
furniture. The coffee table, like the end tables, is red oak with
walnut accents. The table also features the same tiles as the end
tables but 16" X 16". We're really happy with the new table.
While
I was at it, I decided we needed a small table for the new couch and I
had a nice piece of cherry that I had been saving for a special project.
My
most recent project is an end table in oak with walnut accents.
The insert in the top is an 18" X 18" floor tile. The idea
is that I could change the look and feel of the table by changing the
insert to another tile, a wood insert, a glass insert or ... Next
will be a second end table and a matching coffee table.
And now there are two.
This is blanket chest that I built recenlty for my daughter.
It was
cherry and maple and the plans were from Wood Magazine.
After I completed the blanket chest, my daughter convinced me that
I needed some way to sign some of my projects. I did some
experimenting and ultimately came up with a small medallion that I made
on my CNC and can glue to the bottom of the chest. I like it and,
surprisingly, learned a lot making it - more information on my CNC page.
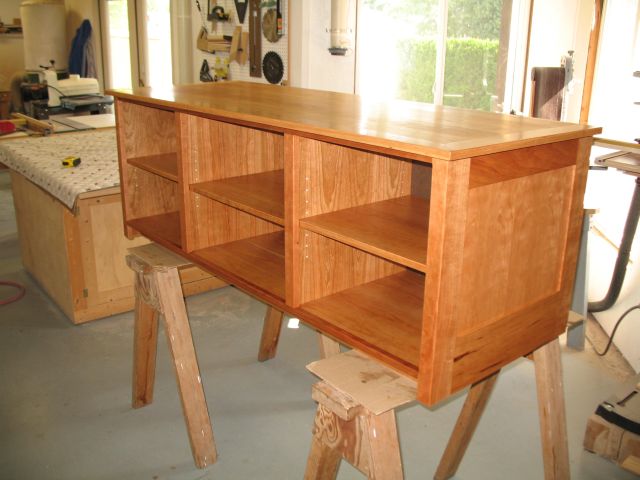
An entertainment center that I built for my son and his wife several
years ago.
This was again in cherry and the plans were modified from
plans in Fine Woodworking Magazine.
I built two of these quilt racks - one for a daughter and and one for a
daughter-in-law.
This hall table was my first cherry project and was built
from a set of plans in Woodsmith Magazine.
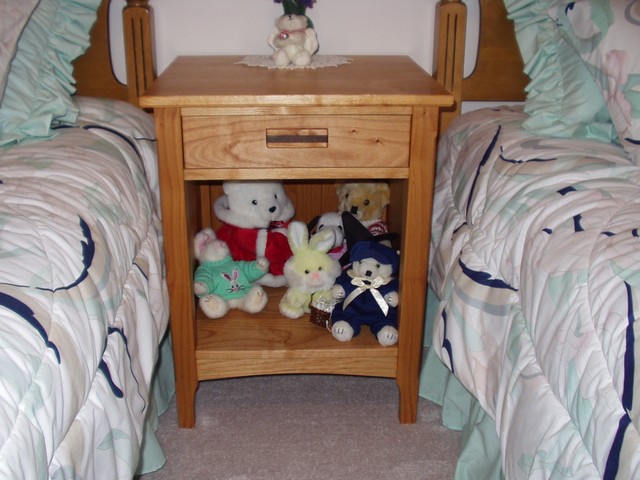
A nightstand for the guest bedroom. It's Alder and was a fun
project. I believe it was from plans in Wood Magazine.
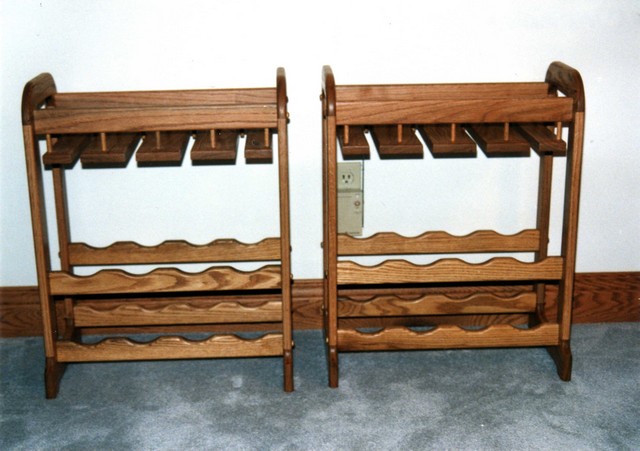
I built several of these wine racks a few years ago. They
were in oak but I have no idea where the plans came from.
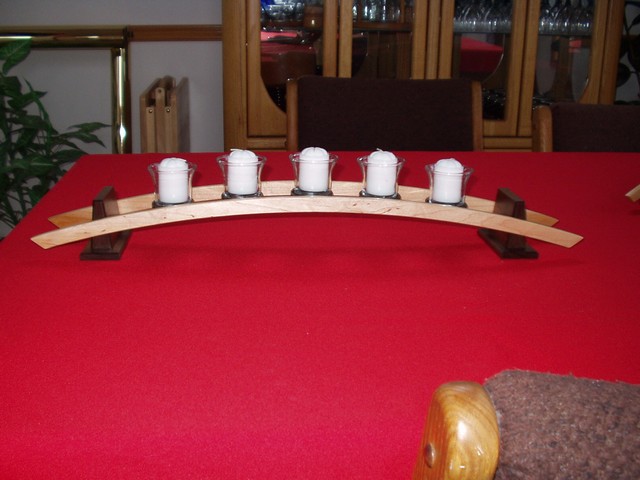
These candle holders are really fun to build and look great.
They are maple and walnut and I have probably built a dozen
of them over the years.
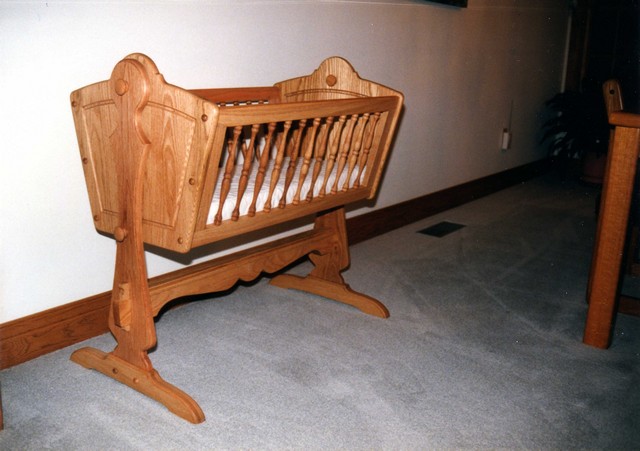
This is a cradle I built for our grandchildren. It's oak and is
completely knock-down since it had to be shipped across country.
I think this was also a plan from Woodsmith Magazine.
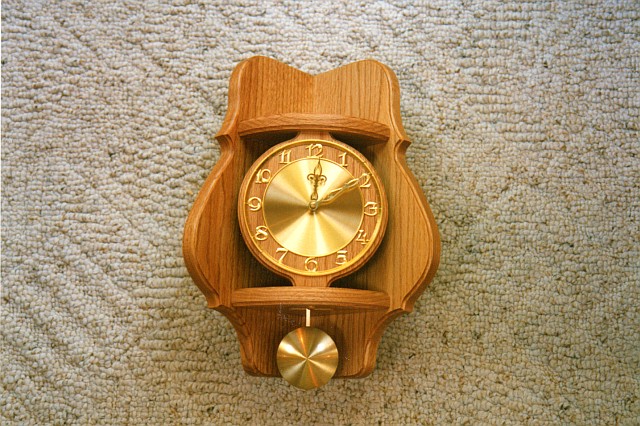
Of course over the years I built several clocks. These first
two, one in oak and one in pine, were built from plans I purchased from KlockKit. I also built one in cherry and one in alder.
This corner clock in oak is also from KlockKit plans.
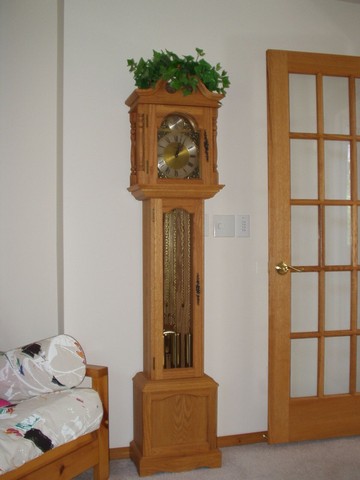
Finally a grandfather clock that was built from a kit from Emperor
Clock.
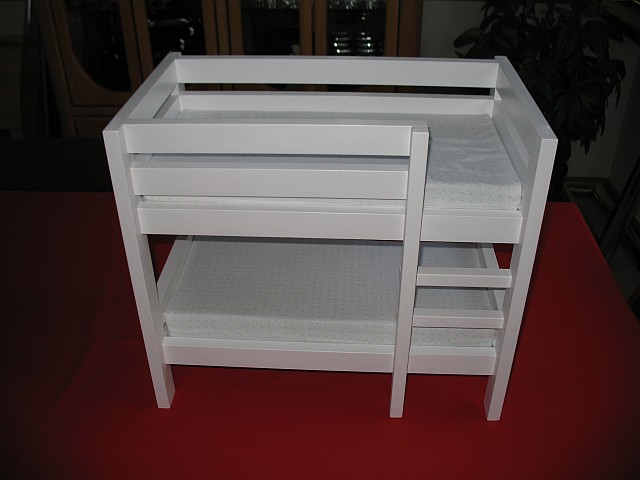
My granddaughter recently decided she needed a bunk bed for her
American Girl dolls - this is one of my first painted projects.
Here's an outdoor nativity set I made recently.
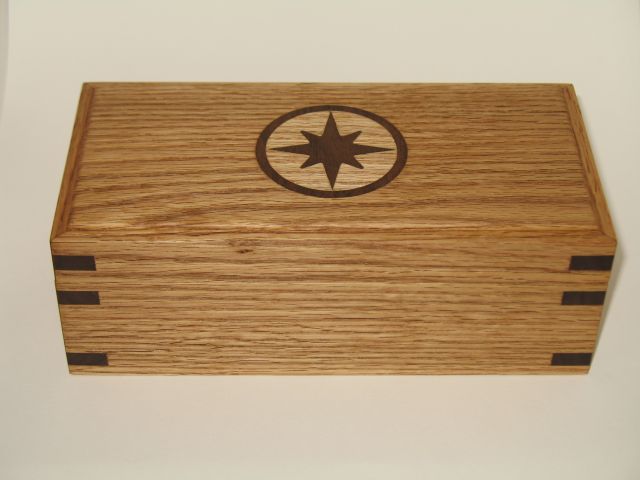
Here's a few boxes I built to play around with doing inlays on my CNC
machine. The first is oak and walnut and the second is cherry
and maple.
Sticking with the CNC theme, here's a sample of some of the ornaments I make.
One Christmas I made 8 different ornaments in 8 different
woods. Here are all of them and a close up of one of my
favorites.
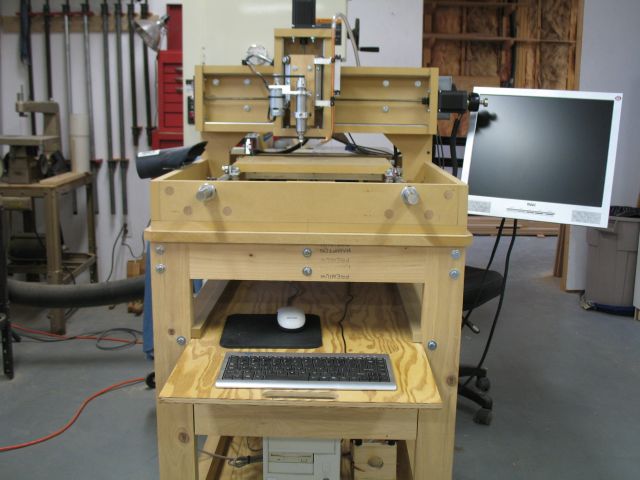
Speaking of CNC, here's the CNC machine I built.
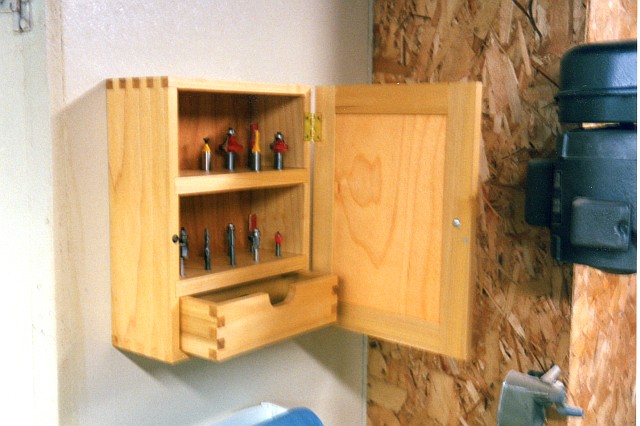
I especially enjoy building furniture, cabinets, jigs and fixtures,
etc. for the shop. It's a great way to try out new
techniques, joints, etc. Here's my first take on a router bit
cabinet.
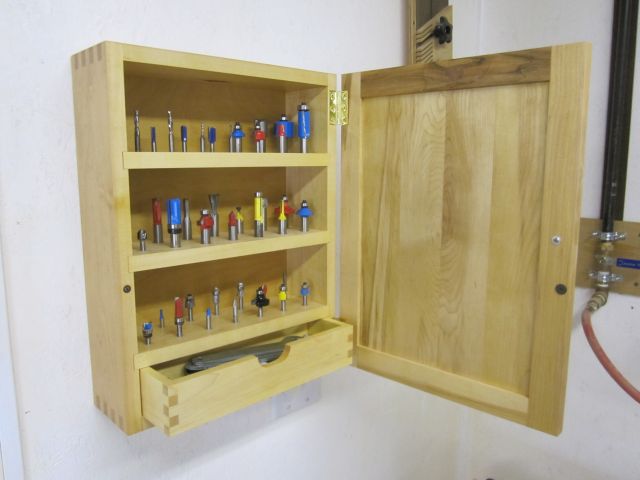
It came out fine but I soon realized it was too small so here's version
2.0 - which unfortunately is also full now.
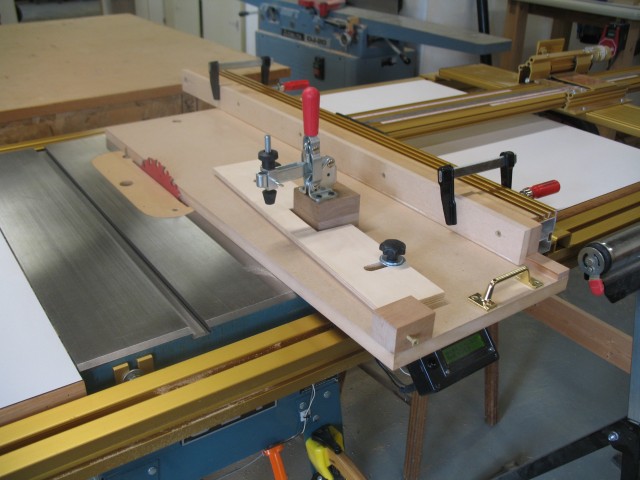
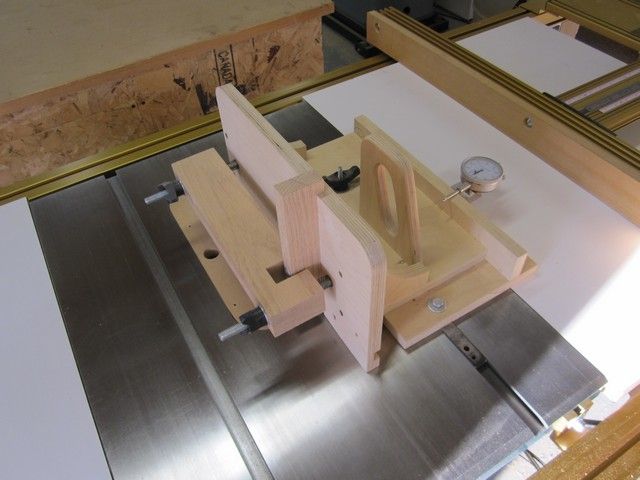
This is another favorite. It's a mortising jig which I have
been very happy with.
While the mortising jig works great and I have used it for numerous
projects, it doesn't work for everything. I like loose tenon
joinery and, while working on a new coffee table, I discovered that the
mortising jig was not very usable on the ends of long rails. The
result was this horizontal slot mortiser based on a set of plans from Greg Paolini. He has a short video on that site showing the mortiser in action.
Working
on the same coffee table project, I needed to make tapered legs.
While I had used temporary tapering jigs in the past, I decided
to make a more permanent version. This one is by Steve Latta in a
Fine Woodworking article from November/December 2012.
Here's my take on a tenoning jig.
I've also built numerous crosscut, mitre, and panel sleds. Here's my latest crosscut sled.
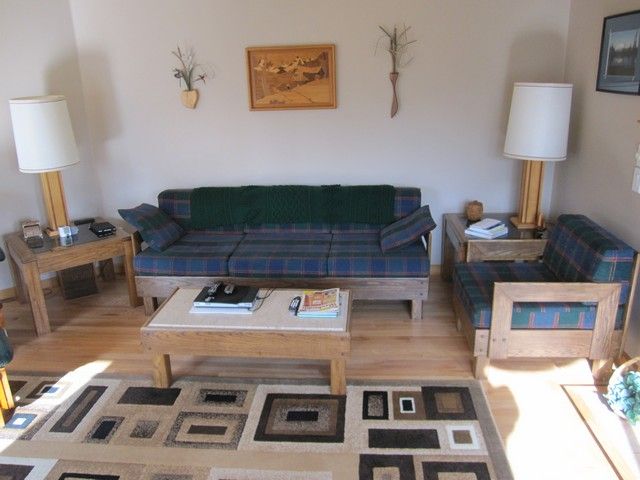
Now for some ancient history. I bought my first power tool, a 12"
Craftsman radial arm saw, almost 40 years ago. My first project
was some living room furniture - a couch, 2 chairs, and 3 tables - all
out of oak. The furniture was pretty primitive but it's still
around and still being used. During that time, we have replaced
the cushions 2 or 3 times and the upholstery 4 or 5 times. I
still have the saw and use it regularly but a Jet table saw is my main piece of
equipment and the radial arm saw is pretty much just used for
crosscutting. I built the lamps as well but they came quite a few
years later.
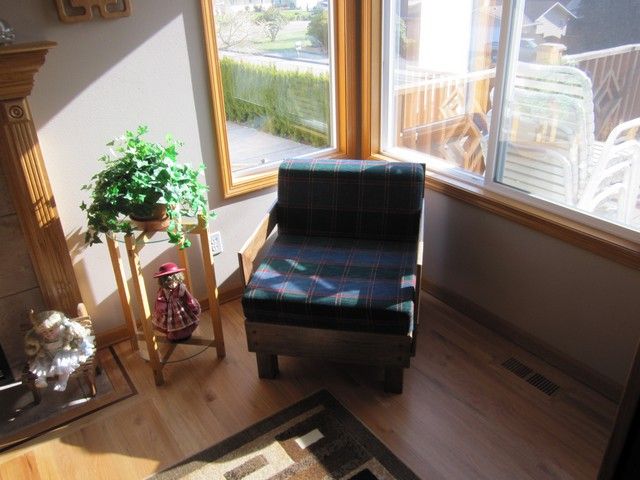
Here's
the second chair and a plant stand that was my first attempt at exposed
mortise and tenon joints. The joints were tight enough that I've
never even glued them.
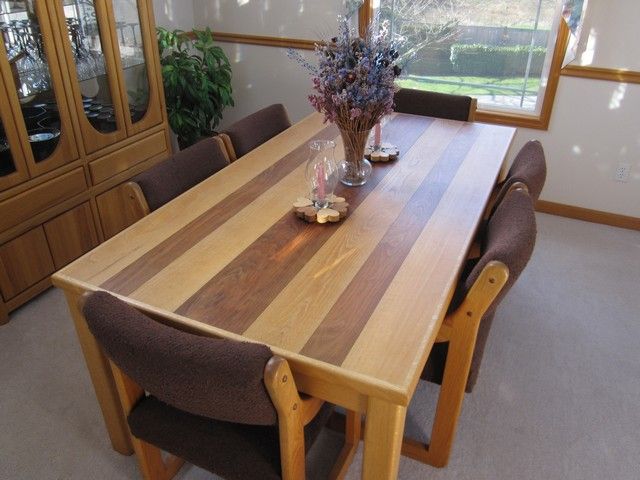
Finally
here's a dining table I built about 30 years ago. Although I had
no clue about seasonal wood movement - and it shows - we are still
using and enjoying the table. In the interest of full disclosure I did not build either the chairs or cabinet.
I think that's enough for now...
Home